
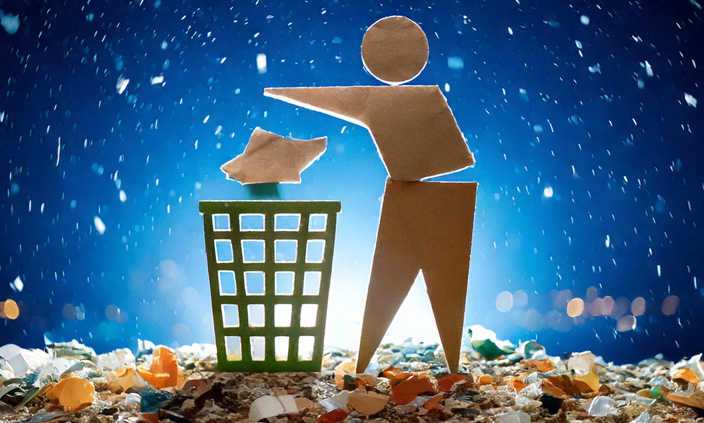
Pre-Christmas Clearout? Keep Your Bin Spark-Free!
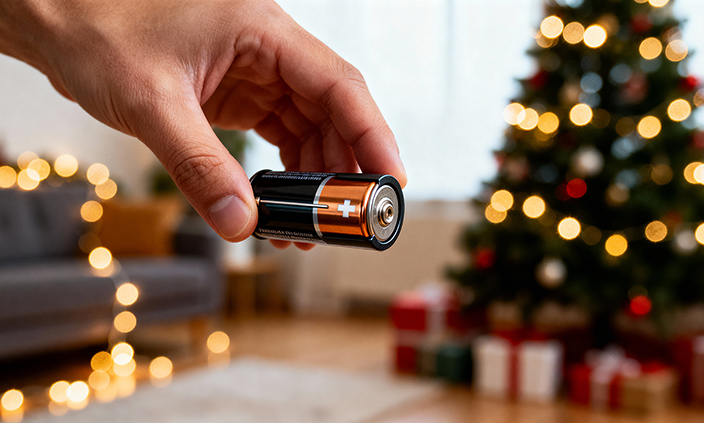
Doing a pre-Christmas clearout? Remember to recycle old batteries safely.
As we prepare our homes for the festive season — putting up decorations, making space for guests, and doing that traditional pre-Christmas tidy — we often come across things we haven’t seen since last year: old chargers, tangled cables, and of course… used batteries.
Before any of these small items accidentally end up in your bin, here’s why a quick bit of sorting now can make Christmas safer for everyone.
Why used batteries matter more than you think
During this time of year, waste trucks and recycling facilities deal with much higher volumes of household waste. Even a single used battery — especially lithium ones found in vapes, remotes, lights, and gadgets — can cause a spark if it’s crushed or damaged.
- That spark can lead to a fire.
- It’s a small risk with big consequences, and it’s completely preventable.
- A pre-Christmas clear-out is the perfect moment to collect used batteries before the bin gets busy.
What you might find during your tidy
The usual suspects hiding in drawers, handbags, and kitchen presses include:
- AA & AAA batteries
- Button batteries (from candles, remotes, decorations)
- Old vapes
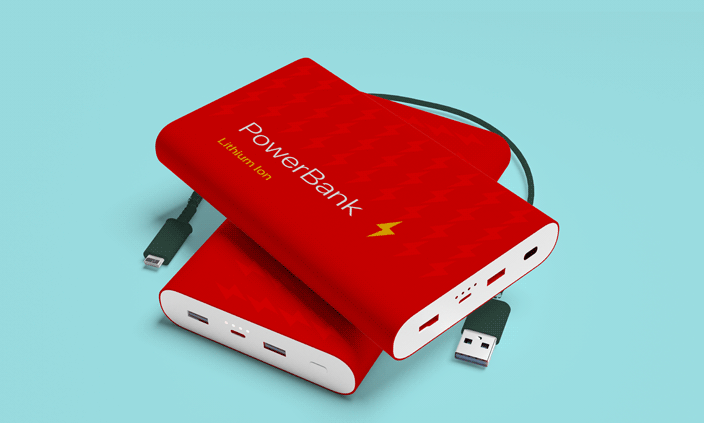
- Power banks
- Dead chargers and cables
- Old electric toothbrush heads or small grooming devices
All of these contain batteries or electrics and should never go in your household bin.
✅ What to do with used batteries
A few simple steps make a big difference:
- Bring used batteries to any shop or supermarket that sells them — they must take them back for free.
- Store loose batteries in a small tub, jar, or Tupperware until you’re ready to recycle.
- Tape the terminals (the ends) to prevent accidental sparks.
- Add old vapes, cables, and small devices to your recycling drop-off list too — they’re all WEEE items.
A quick trip now means fewer risks later in the month.
🚫 What not to do
Avoid the most common mistakes:
- ❌ Don’t put any batteries in general or recycling bins
- ❌ Don’t leave them loose with metal items like keys, coins, or tools
- ❌ Don’t store large quantities at home for long periods
- ❌ Don’t forget about items that contain hidden batteries
A calm, early clean-out helps keep our bins and crews safe through the busiest collection season of the year.
A safer start to the season
Doing your pre-Christmas clear-out is one of the simplest ways to reduce battery fires in waste trucks — and it only takes a few minutes.
Find your nearest drop-off point at: mywaste.ie
Everyday items can cause bin fires!
We often think of batteries and vapes as the main culprits behind bin fires — but they’re just part of the story. Many ordinary household items can pose serious fire risks when tossed into bins without a second thought.
These items are small, common, and easy to overlook — but once compacted in a waste truck, they can spark, overheat, or even explode.
Common Hidden Fire Risks
-
Power banks & gadgets – contain lithium batteries that can ignite if damaged or crushed.
-
Electrical cables & chargers – can short or spark when frayed or compressed.
-
Mini gas canisters / camping gear – contain pressurised gas that can burst under heat or pressure.
-
Hot ashes – can smoulder for hours and reignite when mixed with waste.
-
Halogen light bulbs & small electronics – need proper WEEE recycling, not household bins.
What to Do
-
Remember – if it’s powered, pressurised, or electrical — it doesn’t belong in your bin.
-
Bring these items to your local civic amenity site or relevant recycling point.
-
Let ashes cool fully and store in a metal container before disposal.
-
When in doubt, check mywaste.ie to find the right recycling option for your area.
What Not to Do
❌ Don’t mix these items into your general waste or recycling bins.
❌ Don’t assume “small = harmless” — these are among the most common fire starters in bins and trucks.
❌ Don’t store damaged electrical items or old chargers with other waste.
Why It Matters
Every year, preventable fires occur in waste trucks and recycling centres because of items like these. A single spark can cause serious damage to equipment, interrupt collection services, and put workers at risk.
By sorting carefully and recycling correctly, you’re keeping your bin, our crews, and your community safe — while helping valuable materials get recovered instead of burned or wasted.
Find Out More
Search any household item at mywaste.ie to see exactly how to dispose of it safely.
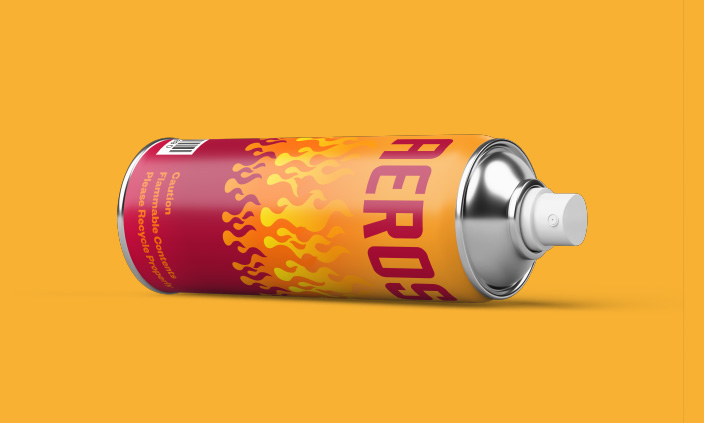
Aerosols? Not in the Bin!
Many everyday household items — deodorant cans, air fresheners, cleaning sprays, etc. are pressurised. When these aerosols are punctured, crushed or heated in waste trucks, they can burst or ignite, posing serious fire and safety risks.
What to do with aerosols
✔️ Bring them to your local civic amenity site for safe disposal.
✔️ Store them upright and away from heat until you’re ready to recycle.
What not to do
❌ Don’t put aerosols in general or recycling bins.
❌ Don’t pierce or crush cans – this is dangerous.
❌ Don’t store them near heat sources or flames.
Why it matters
Pressurised containers are a hidden fire and explosion risk. When mixed with other waste, they can ignite and cause serious fires in trucks or waste facilities.
Handled correctly, aerosols can be safely recycled – the metal can be reused, and harmful gases or propellants are managed properly.
You’re not just keeping your bin safe – you’re helping protect workers and the environment.
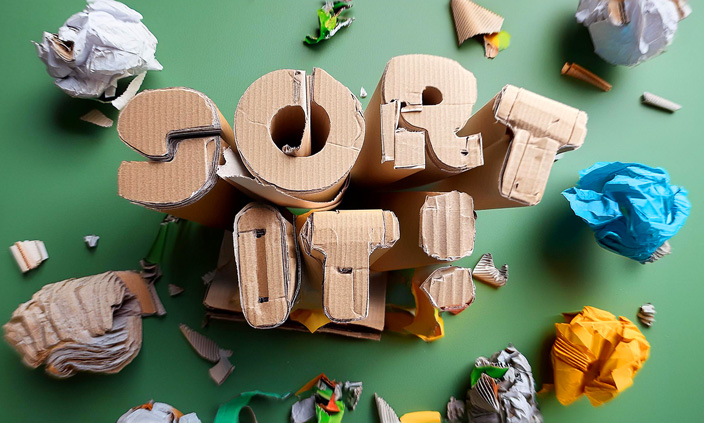
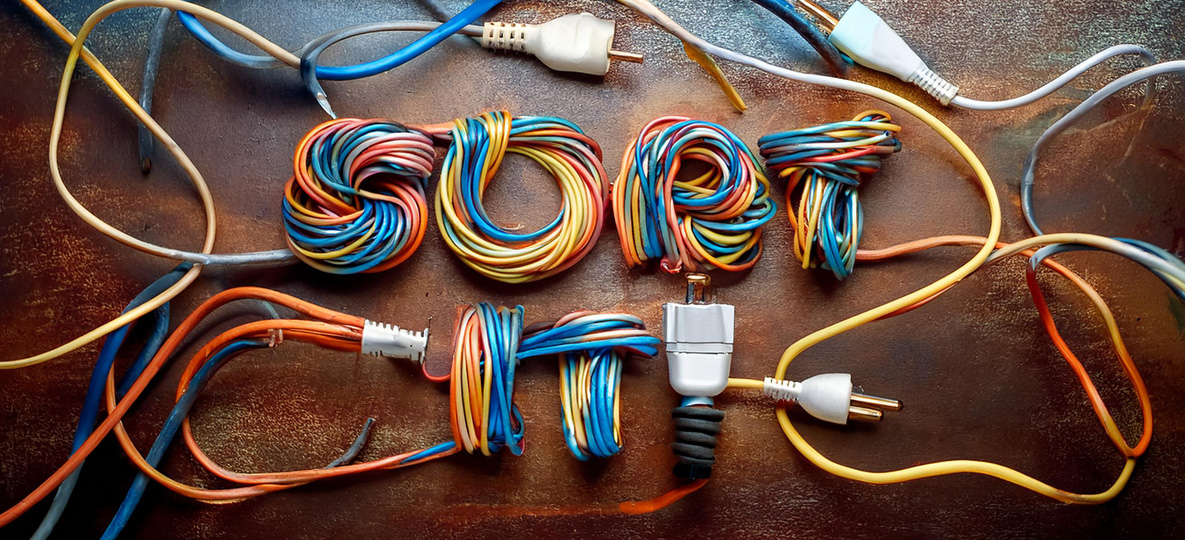
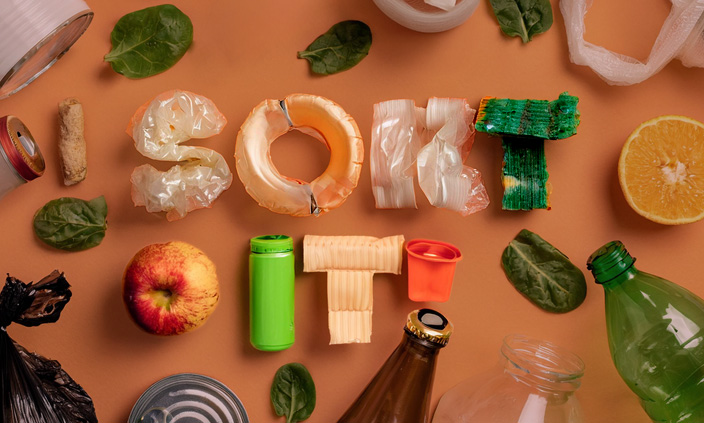
Sort It! – How Segregated Bins Can Cut Your Waste Costs
Waste management in the workplace isn’t just about being green — it’s about saving money too.
One of the easiest ways to reduce your waste bills is bin segregation: making sure different waste streams are separated at source. When you “sort it” in the office, warehouse, café, or showroom, you’re cutting contamination, reducing landfill charges, and maximising recycling rebates.
Here are some practical tips to get started:
1. Know Your Waste Streams
In Ireland, most commercial premises will benefit from separating into:
-
General Waste (black or grey bin)
-
Mixed Recycling (green bin)
-
Food Waste (brown bin)
Some workplaces might also need dedicated bins for glass, cardboard, or confidential shredding. Check our ‘what can go in your bin’ guide — and make sure everyone knows what goes where.
2. Position Bins Where the Waste Happens
People are more likely to sort correctly when it’s easy.
-
Place bins in kitchens, staff rooms, print stations, and near desks.
-
For retail or hospitality, put them back-of-house and at customer points.
Avoid the “single lonely bin” in the corner — it just becomes a dumping ground for everything.
3. Use Clear Labelling & Colour Coding
Labels with photos of what goes in each bin work best — especially for new staff or visitors.
Stick to standard Irish colours where possible:
-
Black/Grey for General Waste
-
Green for Recycling
-
Brown for Food Waste
The less people have to think, the better the segregation will be.
4. Train Your Team (and Keep It Fresh)
A short briefing or toolbox talk can make a big difference.
-
Explain why segregation matters (lower costs, better for the planet, avoids fines).
-
Do quick “bin audits” every few months and share the results with the team.
-
Celebrate improvements — a simple email or shout-out works wonders.
5. Monitor Your Costs & Volumes
We can supply reports showing weight per waste stream.
-
If your general waste volumes drop, you’ll see the savings in your bill.
-
More recycling = fewer landfill charges.
Some companies have cut their waste costs by 20–40% just by improving segregation.
The Bottom Line:
Segregated bins aren’t just good for the environment — they’re good for your budget. By making it easy for staff and customers to sort correctly, you’ll reduce disposal costs, improve recycling rates, and help Ireland meet its waste targets.
#SortItCampaign #Sustainability #OfficeRecycling #EcoFriendly #GreenOffice #WasteManagement

Let’s Work Together & Sort It! at Work
As the focus on sustainability continues to grow, offices have become key areas where significant environmental impact can be made. Implementing sustainable practices within the workplace not only helps the environment but can also create a more positive and engaging work culture. In this blog post, we’ll share some handy hints to help improve recycling efforts and promote sustainability among workers in your office.
-
Set Up Clearly Labelled Recycling Stations
One of the simplest ways to encourage recycling in the office is by setting up clearly labelled recycling stations. Ensure that bins for paper, plastics, glass, and general waste are easily accessible and clearly marked. This reduces confusion and makes it easier for employees to dispose of their waste correctly.
Tip: Place recycling stations in high-traffic areas such as the kitchen, near printers, and in break rooms. Include posters or guides above the bins to remind staff of what can and cannot be recycled.
-
Encourage Paperless Practices
The digital age offers countless opportunities to reduce paper use in the office. Encourage employees to embrace paperless practices by using digital documents, emails, and cloud storage instead of printing.
Tip: Set printers to double-sided printing by default and encourage staff to think before they print. Offer training sessions on digital tools that can help reduce paper usage, such as PDF editing software or cloud collaboration platforms.
-
Reuse Office Supplies
Before purchasing new office supplies, consider whether existing items can be reused or repurposed. Items like file folders, binders, and envelopes can often be used multiple times before they need to be replaced.
Tip: Create a designated area for reusable supplies where employees can drop off or pick up items they no longer need. This can reduce the demand for new supplies and minimize waste.
-
Promote the Use of Reusable Items
Encourage employees to use reusable items such as coffee mugs, water bottles, and lunch containers. This reduces the amount of single-use plastic and paper waste generated in the office.
Tip: Provide reusable items branded with the company logo as part of an eco-friendly welcome pack for new employees. Consider setting up a dishwasher in the office kitchen to make it easier for staff to clean and reuse their items.
-
Organise Office Recycling Challenges
Make recycling fun by organizing office-wide recycling challenges. Set goals for reducing waste or increasing recycling rates, and offer rewards for teams or individuals who achieve the best results.
Tip: Track the office’s recycling progress and share updates regularly. Consider rewarding the winning team with a lunch outing, extra break time, or a donation to an environmental charity in their name.
-
Educate and Engage Employees
Education is key to improving sustainability in the workplace. Provide regular training sessions or workshops on recycling and sustainable practices. Share tips and success stories in company newsletters or on the intranet.
Tip: Invite guest speakers from local recycling organizations or environmental groups to give presentations or hold Q&A sessions with employees. This can provide valuable insights and inspire further action.
-
Implement a Green Office Program
Consider implementing a formal green office program that includes policies and practices focused on sustainability. This can range from simple initiatives like energy-saving measures to comprehensive programs that address all aspects of office operations.
Tip: Establish a “Green Team” of volunteers who are passionate about sustainability. They can help drive the program, monitor progress, and come up with new ideas to improve the office’s environmental impact.
-
Reduce Energy Consumption
Encouraging energy-saving habits is another important aspect of sustainability. Simple actions like turning off lights when not in use, using energy-efficient appliances, and setting computers to sleep mode can make a big difference.
Tip: Install motion sensors for office lighting in less frequently used areas such as storage rooms and bathrooms. Encourage staff to unplug chargers and electronics when they’re not in use to avoid phantom energy drain.
Conclusion
Improving sustainability in the office is not only beneficial for the environment but also for the overall well-being and morale of employees. By implementing these handy hints, you can create a more eco-friendly workplace that encourages recycling and sustainable practices among workers. Let’s work together to make our offices greener and more responsible places to work.
#SortItCampaign #Sustainability #OfficeRecycling #EcoFriendly #GreenOffice #WasteManagement
Encouraging sustainable habits in the workplace is a collective effort. Start small, but think big—every action counts toward a more sustainable future!
A Guide to everyday recycling symbols
But, with so many symbols, it can get a little confusing. Our friends in Repak have compiled a simple guide to familiar symbols to help you make sense of it all.
Recycling symbols now appear on everyday items and packaging to keep you in the loop. The symbols will let you know if a product can or can’t be recycled.
It’s important that you can identify and understand these symbols so that you can play your part in recycling, always remembering to put the right thing in the right bin, CLEAN, DRY and LOOSE.
Below are some of the more common ones…
![]()
A relatively new logo to recognise. When you buy a drink in a container with the Re-turn logo, you are charged a small refundable deposit. You can then claim back the levy by returning the empty container.

This a European trademark and it means that suppliers and producers have contributed financially to the recycling of packaging in Europe. For example, Repak Members can use this symbol on their packaging as they pay fees to Repak to fund recycling in Ireland. The symbol does not necessarily mean that the packaging is recyclable, has been recycled or will be recycled.
The Mobius symbol indicates that a product’s packaging can be recycled, not that it has been recycled or that it is accepted in all recycling collection systems. The symbol may be accompanied by a percentage figure in the middle to explain that x% of the packaging is recycled.
The ‘Tidyman’ symbol asks you not to litter. It is a reminder to dispose of your waste carefully and thoughtfully.

MyWaste.ie (an initiative brought to you by the Regional Waste Management Offices on behalf of the Department of Climate Action, Communications and the Environment) has developed its own symbols for use on packaging in Ireland. This symbol indicates that packaging can be recycled in your household recycling bin. For more information see MyWaste.ie

Perfect Pumpkin Carving
Carve Your Pumpkin & Compost the Rest!

What do you need for pumpkin carving?
Forget fancy kits! Everything you need is likely already in your kitchen. Here’s what you need to make the perfect Jack-O-Lantern.
Essential tools
- Small serrated knife or paring knife: Ideal for detailed patterns. Small knives are safer and easier to use than bigger ones.
- Ice cream scoop or large spoon: Perfect for scooping out the seeds and pulp. The curved edge makes it easy to scrape the sides clean.
Other handy tools
- Apple corer: Great for making small, round holes—perfect for adding details like polka dots.
- Marker: Use it to sketch your design before carving. Let the kids get creative too!
- Potato peeler: Useful for shaving the pumpkin’s skin to create different textures.
- Large bowl: Keep the seeds and pulp in a bowl for later — you can roast the seeds or compost everything!
- Metal biscuit cutters: Press these into the pumpkin for fun shapes like stars or moons.
- Lemon zester: Add fine details and textures without cutting all the way through.
- Templates and stencils: Not confident in your freehand skills? Stencils are a lifesaver.
—
Pumpkin carving tips
- Choose the right pumpkin: Fresh pumpkins stay intact longer. Look for vibrant color and a sturdy stem.
- Sketch your design: Draw it on paper first, then tape it to the pumpkin to use as a stencil.
- Cut big pieces first: Start with the larger sections, then clean up your design.
- Keep it fresh: Store your pumpkin in the fridge when not on display, and apply a thin layer of Vaseline along the cut edges to keep them from drying out.
- Choose the right light: Real candles give a traditional glow, but if your pumpkin is outdoors, fake tea lights are more weather-friendly.
—
How to carve the perfect pumpkin
- Cut the top off: Grab a sharp serrated knife and cut the top of your pumpkin off—that’s your crown.
- Scoop out the insides Use a large spoon to scoop out the seeds and fibres. Save the seeds if you want to roast them later! Put all the pulp into your brown bin if you’re not planning to eat it—we’ll make compost from it.
- Carve your design Draw your spooky (or silly!) face with a marker. Use a small serrated knife to cut out the eyes, nose, and mouth. Always cut away from yourself for safety.
- Light it up Pop a tea light inside, light it, and put the crown back on. Your pumpkin is ready to shine!
—
Don’t forget: We want your leftover pumpkin!
When you’re done carving, toss the pulp and pieces into your brown compost bin. Not only will you have the spookiest house on the block, but you’ll also be helping us make rich compost. It’s a win-win for Halloween and the environment!
Happy Carving — and Composting!

Closing the Loop — The Life Cycle of Recycled Products
Recycling is more than just tossing your waste into the correct bin. Every item we recycle embarks on a transformative journey, contributing to a circular economy where materials are continuously reused and repurposed.
In this blog post, we’ll explore the life cycle of recycled products, how they are transformed into new materials, and why it’s important to continue improving recycling habits both at home and in the workplace. We’ll also highlight how Ireland is progressing with its recycling goals and provide actionable steps to make a bigger impact.
-
The Collection and Sorting Process
The first stage in the life cycle of a recycled product starts with proper sorting and collection. Once materials like paper, plastic, glass, and metals are placed in the correct bins, they are collected by waste management companies and transported to sorting facilities. Here, recyclable materials are separated into different streams using both manual labour and automated machines.
Ireland’s Progress: According to the Environmental Protection Agency (EPA), Ireland achieved a municipal waste recycling rate of 41% in 2021 Home. However, contamination remains an issue, which makes sorting even more critical to ensuring materials are properly recycled.
Tip: At home and at work, ensure that items placed in recycling bins are clean and sorted correctly to avoid contamination and increase the chances of successful recycling.
-
Processing and Manufacturing of Recycled Materials
Once the materials are sorted, they are sent to processing plants where they undergo transformation into raw materials. For example:
- Paper is cleaned, pulped, and remade into new paper products such as newspapers, office paper, and cardboard.
- Plastics are shredded, melted, and reformed into pellets that can be used to create new plastic items like packaging or outdoor furniture.
- Glass is crushed, melted, and reformed into new glass bottles or jars, often using less energy than creating new glass from raw materials.
Statistic: Ireland’s recycling efforts resulted in the collection of 1.2 million tonnes of packaging waste in 2021, with 58% being successfully recycled Home. By increasing recycling rates, we can ensure more materials are processed and repurposed.
-
The Role of Recycled Products in Manufacturing
The next stage in the life cycle of recycled products is their integration into new products. Many industries use recycled materials in manufacturing to reduce costs and lower their environmental impact. For example:
- Plastic bottles can be turned into fleece clothing, carpeting, or construction materials.
- Recycled metals such as aluminium are used to create everything from new cans to parts for vehicles.
- Recycled glass can be used in construction as an aggregate or even in making new glass containers.
This stage of the life cycle emphasizes the importance of separating materials for recycling, as manufacturers rely on clean and quality recycled content to create new products.
Tip: Encourage the purchase of products made from recycled materials both at home and in the office. This helps close the recycling loop and supports the continued demand for recycled goods.
-
Closing the Loop: Consumer Use of Recycled Products
After recycled materials are transformed into new products, they are once again introduced to consumers. The cycle continues when these items are used and, at the end of their lifespan, recycled once more.
For example:
- Recycled office paper can be used in the workplace, and when discarded properly, it can be recycled again into more paper products.
- A plastic bottle used by a consumer can be recycled and re-enter the market as part of a new product, like garden furniture.
Statistic: The use of recycled materials reduces the need for virgin raw materials. Recycling aluminium, for example, saves 95% of the energy required to produce aluminium from raw bauxite Home. By reusing materials, we conserve natural resources and lower carbon emissions.
-
Why Improving Recycling Habits Matters
The life cycle of recycled products illustrates how every item we recycle can make a difference in creating new products and reducing environmental impact. By recycling correctly at home and at work, we support this circular system, reducing the need for raw materials and conserving energy.
Challenges in Ireland: While Ireland has made significant progress, challenges remain. For example, plastic packaging recycling rates were only 32.7% in 2021, falling short of the EU’s upcoming targets Home. Increasing education on proper recycling and encouraging the use of recycled products can help Ireland meet these targets.
Conclusion
Understanding the life cycle of recycled products helps us realise the importance of recycling correctly. From collection to processing, and from manufacturing to consumer use, every item we recycle contributes to reducing waste, conserving resources, and supporting the circular economy. Whether at home or in the workplace, by making small changes to improve recycling habits, we can have a big impact on the environment.
#SortItCampaign #LifeCycleOfRecycling #Sustainability #EcoFriendly #RecycledProducts #WasteManagement
Let’s all work together to improve our recycling habits and ensure that materials continue to be reused in Ireland’s growing circular economy.

Yes WEEE Can!
It’s no secret that we love our devices! Continuous advancements in technology bring new products and gadgets into our homes, resulting in old electronic goods that need to be disposed of. However, most end-of-life products contain metals and minerals that can be recovered, as well as harmful substances that need to be disposed of carefully.
All across Ireland, we are buying more electrical goods than ever – with people purchasing an average 22kg per head in 2023 compared to 16kgs just five years ago (according to WEEE Ireland CEO Leo Donovan). Shopping stats show a surge in spend on new electrical devices like mobile phones, computers, small kitchen appliances and white goods.
With old items still lying around many households we want to encourage people to recycle these for FREE.
Why should I recycle my electronic waste?
- Electronics contain harmful substances such as lead, mercury, and cadmium, which must be disposed of correctly. By recycling your e-waste, you are reducing the number of harmful substances going to landfills.
- Raw materials recovered from waste appliances can be recycled and reused.
- To conserve natural resources as materials such as plastics, glass and metals are recovered for use again by manufacturers.
So, what is the best way to dispose of electronic waste?
- Give your e-waste to a certified electronics recycler
Recycling centres, not-for-profit organisations, such as WEEE Ireland and local civic amenity sites allow you to recycle your electronic waste for FREE! You will find an interactive map on the WEEE website that will guide you to your nearest local recycling centre, Public Collection Day, Electrical Retailer and Bulb Exchange Store. - Sell your outdated technology
One man’s junk is another’s treasure. You can easily sell your old electronic appliances on an online marketplace such as Facebook Marketplace or Donedeal. Not only are you promoting the circular economy by giving your e-waste a new lease of life, but it is also a good chance to make some money.
- Donate your old electronics
If you do not wish to sell your outdated technology, there is always the option to donate it. Many charities in Ireland accept electronics.
When selling/donating electronic goods, it is important to ask 2 questions:
- Is it working properly?
- Is there any personal information saved on the computer/phone/laptop that should be deleted?
With all of that in mind, we are hosting a FREE electronics recycling event with WEEE Ireland in our recycling centre in Oranmore on Saturday the 5th of October.
People in Galway have contributed greatly to e-waste recycling every year, with 2,748 tonnes of electrical waste collected in the county in 2023, and we want to encourage that trend.
What can I bring?
All household items with a plug or a battery will be accepted free of charge, including old washing machines, TVs, toasters and kettles, electronic tools and toys, cables, IT equipment, mobile phones, remote controls, and even watches.
Is it free?
Yes, to dispose of WEEE, but if you have other materials to dispose of there will be a small charge as normal.
Do I need to be a TCBC customer?
No – this is open to the general public as well as customers, everyone is welcome.
How much can I bring?
As much or as little as you want – there’s no cap on the amount, but bear in mind this is intended for household, not commercial, recycling.
What can’t I bring?
Industrial refrigeration, and anything that the team deems as potentially hazardous.
Where is the WEEE collection event?
The City Bin Co. Recycling Centre, Oranmore, Co. Galway, H91 EVW3
When is the WEEE collection event?
Saturday October 5th from 10am – 4pm
About WEEE Ireland
WEEE Ireland is a not-for-profit organisation, founded by Producers of electrical and electronic appliances to help them comply with the legal obligations imposed by the EU Battery Directive 2006/66/EC and WEEE Directive 2012/19/EU.
WEEE Ireland manages the collection of household e-waste, lighting and solar PV equipment and batteries from authorised collection points for recycling, on behalf of its 1,300 producer members.
WEEE Ireland’s objective is to provide cost-effective quality compliance for producers to meet the requirements of the regulations whilst minimising the cost to the consumer.
Common Recycling Mistakes To Avoid
Recycling is one of the easiest and most impactful ways to contribute to a more sustainable planet.
However, even well-intentioned recyclers can make mistakes that reduce the effectiveness of recycling efforts. In Ireland, recycling contamination is a major issue that can lead to entire batches of recyclable material being sent to landfill instead of being reused. By identifying and avoiding common recycling mistakes, we can significantly improve recycling outcomes both at home and at work. In this post, we’ll discuss some of the most common recycling mistakes and provide tips on how to avoid them.
Placing Non-Recyclable Items in the Recycling Bin
One of the most common mistakes people make is assuming that everything can be recycled. Items such as soiled or dirty plastic bags, disposable coffee cups, and greasy pizza boxes are often mistakenly placed in recycling bins. These items can contaminate recyclable materials, making the whole batch unrecyclable.
Tip: Always check your local council’s guidelines on what can and cannot be recycled. In Ireland, the key recyclable items are clean plastic bottles and containers, paper, cardboard, and cans. Items like soiled or dirty plastic bags, and food-soiled packaging should not be placed in the recycling bin (Home).
Not Cleaning Recyclables Properly
Food residues and liquids left in containers can contaminate other recyclable materials, rendering them unfit for recycling. For example, a jar of peanut butter that hasn’t been rinsed can ruin an entire batch of paper or cardboard that comes into contact with it.
Tip: Take a few moments to rinse out bottles, jars, and containers before placing them in the recycling bin. This helps ensure that the materials can be properly processed without contamination.
Recycling Plastic Bags and Soft Plastics
In Ireland, plastic bags and soft plastics are a common source of recycling contamination. While many people assume they are recyclable, these items can cause issues in recycling plants by jamming machinery. Soft plastics like cling film, crisp packets, and shopping bags should not be placed in household recycling bins.
Statistic: According to Repak, an organization dedicated to recycling packaging in Ireland, only 32.7% of plastic packaging was recycled in 2022 (Repak). Properly segregating soft plastics from recyclable materials is crucial to improving this rate.
Tip: Many supermarkets and large retailers offer dedicated bins for recycling soft plastics. Use these collection points for items like plastic bags and plastic film instead of your household recycling bin.
Recycling Coffee Cups and Takeaway Containers
Disposable coffee cups and certain takeaway containers are another common mistake. While they may seem like recyclable materials, most disposable coffee cups are lined with plastic, which makes them difficult to recycle. Similarly, many takeaway containers are contaminated with food, making them unsuitable for recycling.
Tip: Instead of recycling, look for dedicated composting solutions for food-contaminated containers or switch to reusable coffee cups and food containers. Many cafes now offer discounts if you bring your own cup.
Ignoring the “Check Locally” Label on Plastics
Some plastic items, especially those labelled with a recycling symbol and a number, might not be recyclable through your local system. These items often require specialized recycling facilities that are not available in all regions. The label “check locally” means that while the material might be technically recyclable, it isn’t accepted by all recycling programs.
Tip: Before recycling plastic items with unfamiliar symbols, visit your local council’s website to check what types of plastics are accepted in your area.
Not Flattening Cardboard Boxes
Large, unflattened cardboard boxes take up a lot of space in recycling bins and can cause inefficiencies in the collection process. If not properly flattened, they may also not be picked up for recycling.
Tip: Always flatten cardboard boxes before placing them in the recycling bin to save space and make collection easier.
Recycling Electronics in the General Recycling Bin
Old batteries, mobile phones, and other electronic devices should never be thrown into general recycling bins. Not only can they cause fires in waste facilities due to the batteries inside, but they also contain materials that need to be processed separately from standard recyclables.
Statistic: In 2022, Ireland collected 10.35 kg of Waste Electrical and Electronic Equipment (WEEE) per capita, surpassing the EU minimum collection target (Central Statistics Office). However, many electronics still end up in general waste streams.
Tip: Always bring old electronics to a dedicated WEEE collection point. These are available at recycling centres, electronic stores, and even some supermarkets.
Throwing Out Reusable Items
Finally, one of the most wasteful mistakes is throwing out items that can be reused. Many items, such as furniture, clothing, and appliances, can be repaired, donated, or repurposed instead of being discarded.
Tip: Before throwing something away, consider whether it can be donated, repurposed, or repaired. Many communities have “freecycling” groups where people can give away or pick up used items.
Conclusion
Improving recycling efforts at home and at work starts with avoiding common recycling mistakes. By being more mindful of what can and cannot be recycled, cleaning recyclables, and using the appropriate disposal methods for items like electronics and soft plastics, we can significantly reduce waste contamination and improve Ireland’s recycling rates.
Statistic: In 2021, Ireland’s overall recycling rate was 41% for municipal waste, with more progress needed to meet the 50% target set for 2025 (Home). By reducing mistakes, we can help reach these goals and support a more sustainable future.