
DIY Pizza Oven – Weekend Project
Fancy yourself as the next Jamie Oliver, casually knocking up the perfect pizza in your outdoor pizza oven? Us too! But while we can’t help with the cooking skills, we can help with the DIY skills involved in creating the perfect upcycled pizza oven. Our colleague Eimhin takes us through the process he used for his project. Buon Appetito!
What you will need:
– Vermiculite
– Fire Bricks (we used ones from an old storage heater)
– 2 crates
– A board to go over crates
– Exercise ball
– Chimney pipe (we used an old truck exhaust)
– Hammer
– Perlite
– Portland cement
– Chicken wire
– Formica
– Pavers
An important element to think about before you start building is where you want to site your oven. Unlike a BBQ, you can’t move your pizza oven once it’s built. Choose a spacious well-ventilated area where there are no flammable objects like plants, home heating oil tanks, or bins.
Step 1: Top dome mould build
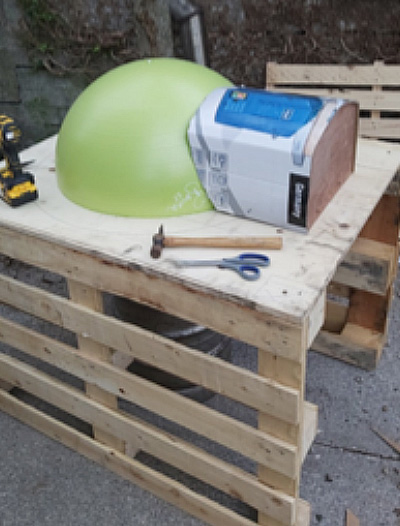
The exercise ball should have its diameter written on it or on the packaging it came in, mine was 96 centimetres. You will need a table or wooden surface to use as the pizza oven base, we used a piece of scrap wood from the garage.
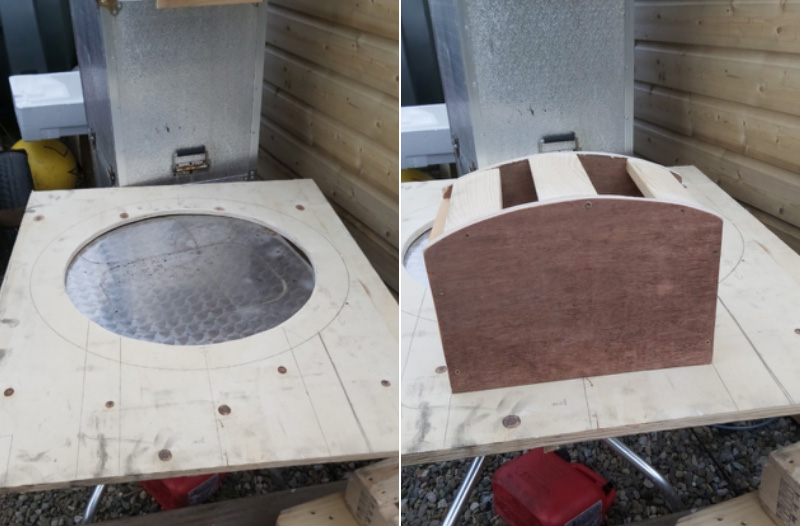
Cut out your circle (sand down the timber before inserting the gym ball to prevent it puncturing) insert the ball so that an upper hemisphere is jammed into the wood securely keeping the air valve facing down to the ground (once inserted inflate more if needed until the ball is wedged), and your dome is created. You will need to place timber under the ball in order to keep it still, I placed an old beer keg under my one.
Then we moved onto the door mouth entrance. Measure your dome height (ours was 12.5 inches) and choose a door height that is not quite as high (we went with a door height of 7.8 inches). Take your time with making the mould, you want to get these details correct.
Once you think your mould is ready, cover the top half of the gym ball and the oven door with food wrap to stop the vermiculite cement mortar from sticking permanently.
Step 2: Mould the Chicken Wire
Being careful not to puncture the ball, shape the chicken wire around the mould, by doing this now it makes it easier to attach it when doing the concrete.
Step 3: Make the concrete mix
To make the vermiculite cement mortar, use a plastic plant pot or small bucket to measure out 6 parts vermiculite and 1-part cement. Begin to add water slowly. You don’t want a watery slurry, but mouldable clumps. If you add too much water, you can always throw more dry mix in. treat this mix like a sponge cake as the air pockets are very important for the heat value, do not use a cement mixer as this will knock out the air.
Add in your ‘chimney’ part, we used an old waste truck exhaust from a truck.
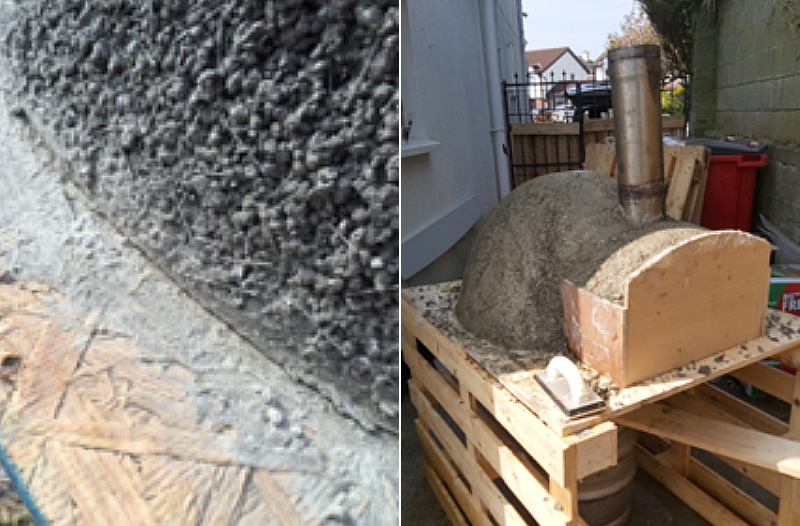
Start adding the first layer of vermiculite cement mixture to the sides of the gym ball and the mouth structure of the oven with your hands, clump by clump. When the first layer is complete, add a further layer until the dome is about 20-30mm thick.
Add the chicken wire reinforcement There is no need to let the first layer dry before you begin the second layer.
Step 4: Finish detail on the Dome top
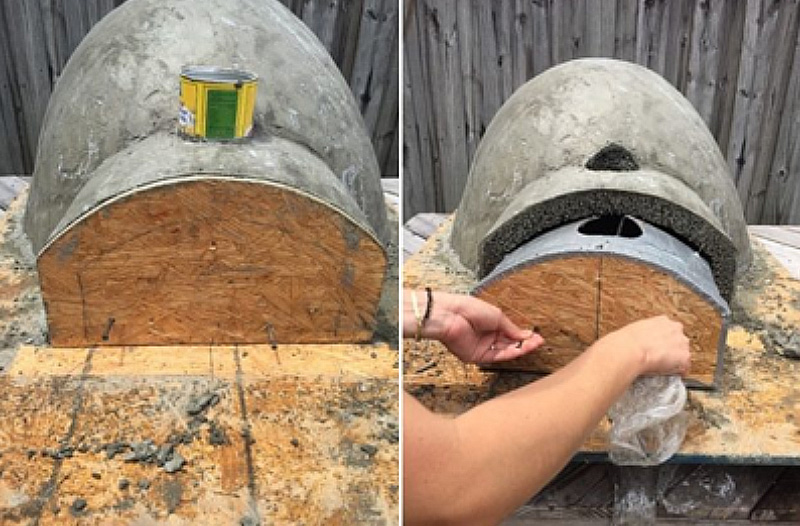
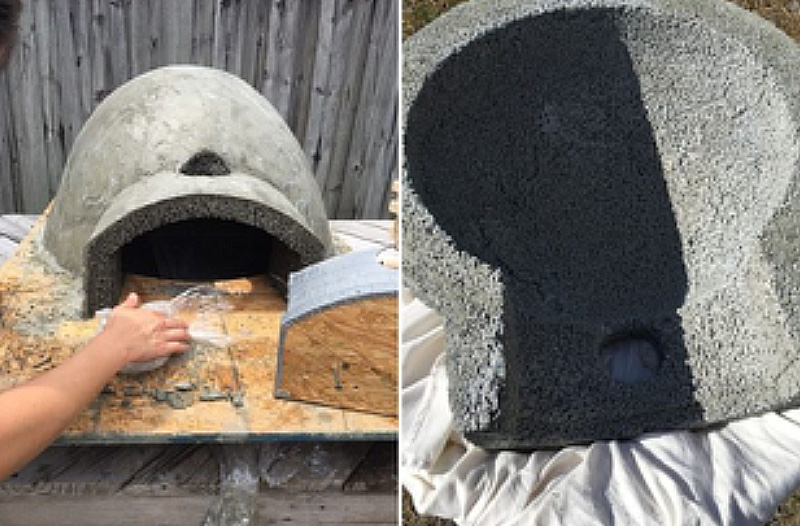
Once your concrete has hardened (mine took 24 hours) you can remove whatever support you were using to keep the exercise ball in pace (we used a keg), you will need to deflate the exercise ball to get it out from under the mould. You can also remove the oven mouth support structure.
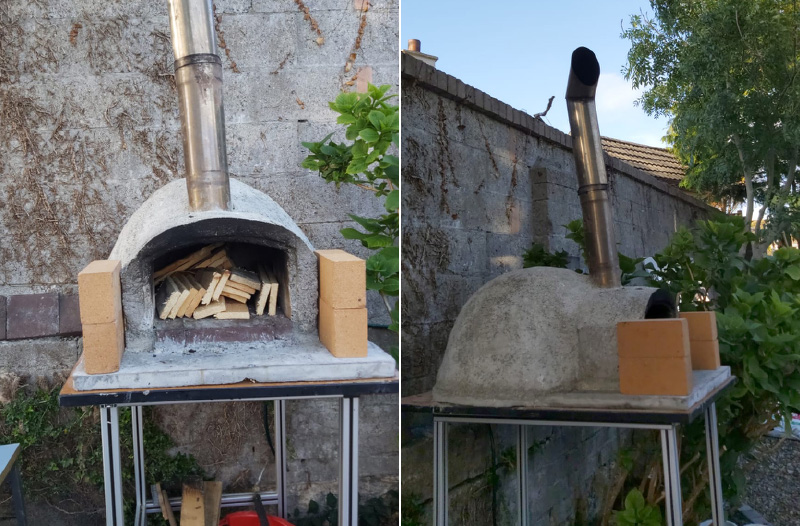
Now you should be left with your pizza oven dome structure, looking something like what we have below.
Step 5: Firebrick Floor
So, the top of the oven is done. Now it is time to work on the bottom. For the firebrick floor, we used firebricks from an old storage heater.
It is important to lay your brick floor in a herringbone pattern. Reason being if you lay your bricks parallel to the door, when you slide your pizza in you run the risk of catching or chipping a front brick edge.
I slid the top dome onto a piece of plywood, traced it out, then took my original circle cut out that I cut out for the exercise ball (giving me the inside circle of the dome) and had my two templates.
We also added some pavers for the oven to sit on.
I then mixed up a small batch of Portland cement and SS needles and trowelled on a thin coat on the floor base. I basically used it as a “glue” for the two pieces.
We then brought over the top and carefully put on the dowels or supports that you’re using spanning to the bricks. We then aligned it and lifted the rear, slid out the dowel and carefully lowered. Then did it in the front.
Then once they are aligned it was just a skim coat around the outside to seal the seam.
We would recommend waiting a couple of weeks before you get your pizza oven fired up to ensure it is good and cured. If you are unsure, just stick your face in the door and smell. If it smells damp or wet get it a few more days.
Step 6: ‘Curing’ the Oven
To fire cure the pizza oven, start small… do not put a roaring fire in there right away!
After 3 weeks we plan to do a small fire (2-3 twigs) let them burn completely and die out.
Then repeat the next day with a medium fire (3-4 twigs) burn and die out.
Then another medium fire… but add to it to keep it at a medium fire for an hour or so
Then another medium to larger fire, burn for an hour…
Then you should be ready for a nice roaring fire.
Finally…
Time for pizza!


